TM 9-2320-266-34
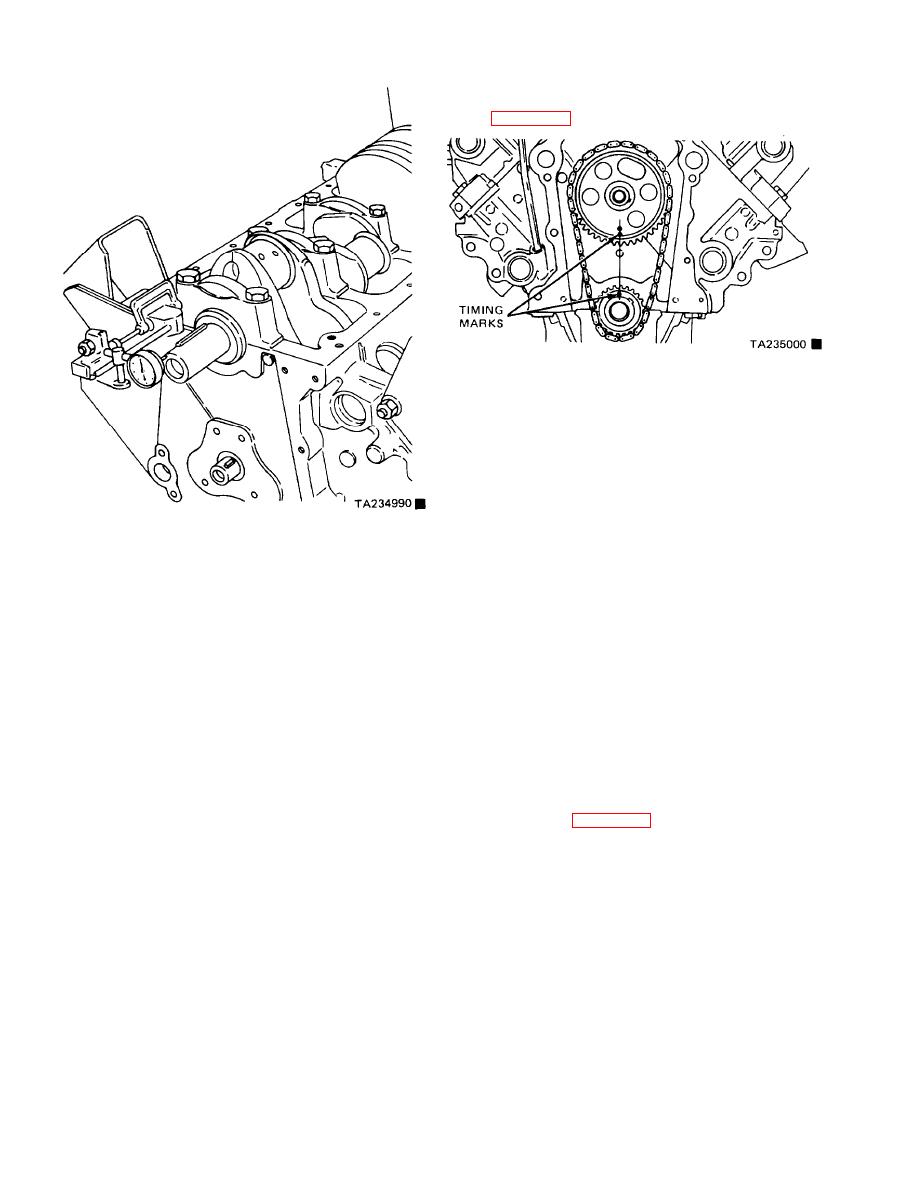
(5) Slide both sprockets evenly over their respective
shafts, and use a straightedge to check alignment of timing
marks (figure 11-37).
Figure 11-37. Alinement of Timing Marks.
(6) Install the fuel pump eccentric, cup washer, and
camshaft bolt. Tighten the bolt to 35 ft-lbs.
(7) Using a new gasket, carefully install the chain case
cover. Tighten the chain case cover capscrews to 30 ft-lbs.
b. Harmonic Balancer.
(1) Lubricate the seal lip. Position the balancer hub
slot on the key in the crankshaft, and slide it on the crank-
shaft.
Figure 11-36. Measuring Grankshaft End Play.
(2) Place an installing tool in position and press the
harmonic balancer on the crankshaft.
h. Checking Bearing Clearances. Measure bearing
clearance as follows:
washer and tighten to 135 ft-lbs.
(1) Smooth the edges of a 1/2- by 3/4-inch piece of
brass shim stock, 0.001 inch thick.
attach it with bolts and Iockwashers. Tighten to 17 ft-lbs
(2) Remove the center bearing cap and lower bearing
(200 in-lbs).
shell.
(3) Lubricate the bearing crankshaft and bolts. Posi-
11-17. Piston and Connecting Rod Assembly.
tion the shim stock across the bearing, install the cap, and
a. Preparation
tighten the bolts to 85 ft-lbs.
(4) If a slight additional drag is felt as the crankshaft
blies into the bore, be sure that the compression ring gaps are
is turned (moved no more than one fourth turn in either
staggered.
direction), clearance is 0.001 inch or less, and is considered
satisfactory. If no drag is felt, the bearing is too large; if the
the oil ring expander ends are butted and the rail gaps are
crankshaft cannot be rotated, the bearing is too small. If the
located as shown in figure 11-16.
bearing clearance is not correct, replace the bearing with the
next size, and repeat the check.
(3) Immerse the piston head and rings in clean engine
oil, slide the ring compressor over the piston, and tighten.
b. Installation.
11-16. Timing Chain and Harmonic Balancer.
(1) Install the upper half of the connecting rod
a. Timing Chain
bearing.
(1) Place both the camshaft and crankshaft sprockets
(2) Rotate the crankshaft so that the connecting rod
on the bench with the timing marks on the exact centerline
journal is on the center of the cylinder bore. The notch or
through both camshaft and crankshaft bores,
groove on top of the piston must be pointing toward the
(2) Place the timing chain around both sprockets.
front of the engine.
(3) Turn the crankshaft and camshaft to lineup with
(3) Insert the rod and piston into the cylinder bore
the keyway location in the sprockets.
and tap the piston down, using a hammer handle.
(4) Lift the sprockets and chain (keep the sprockets
tight against the chain in the position described).
Change 7
11-16


