TM 9-2320-266-34
Section IV. REASSEMBLY
11-13. Distributor Drive Shaft Bushing.
Use this procedure if the distributor drive shaft bushing
is to be replaced. Otherwise, proceed to paragraph 11-14.
a. Removal.
(1) Insert tool C-3052 into the old bushing and
thread it down until a tight fit is obtained (figure 11-30).
Figure 11-32. Burnishing Distributor Drive Shaft Bushing
11-14. Camshaft.
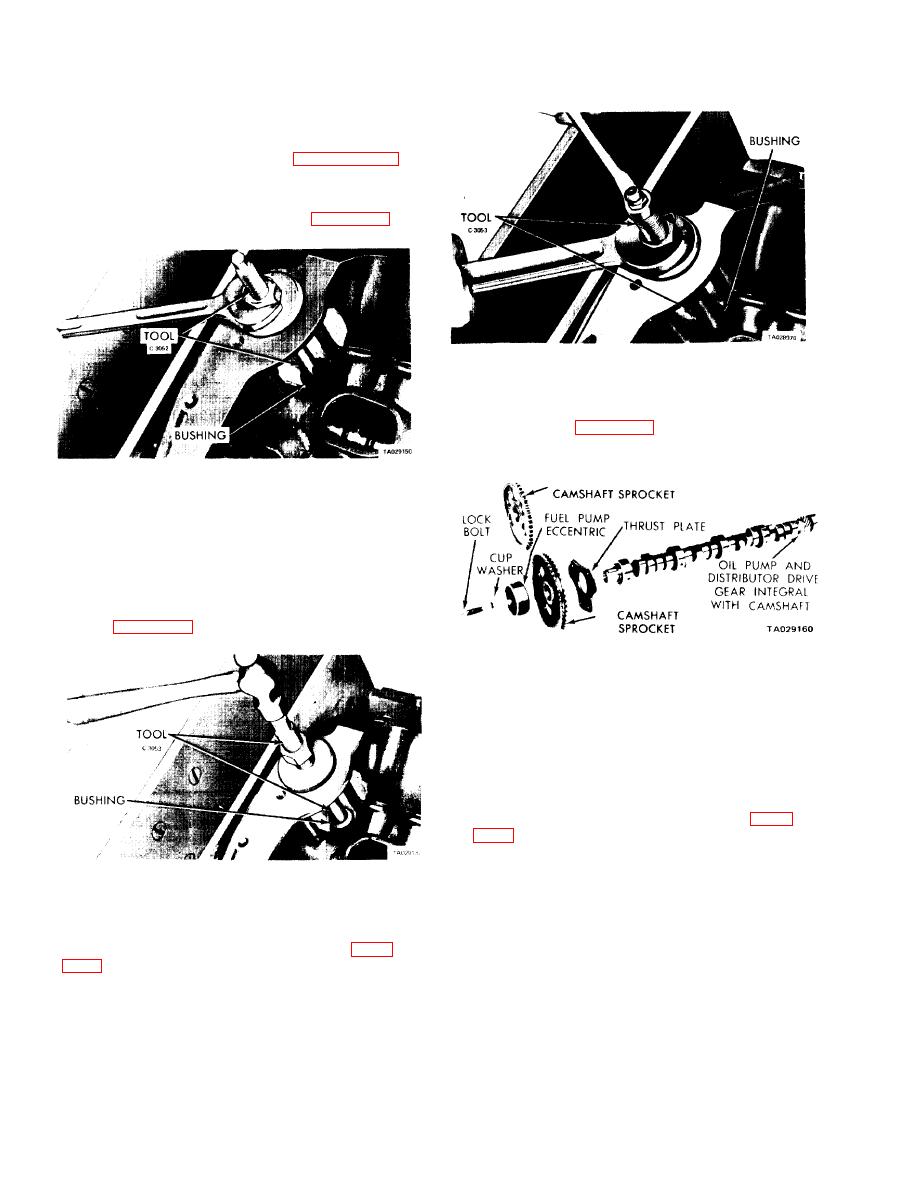
a. General The disassembled camshaft and sprocket
assembly is shown in figure 11-33. Make sure the shaft is
thoroughly lubricated prior to installation.
Figure 11-30. Removing Distributor Drive Shaft Bushing.
(2) Hold the puller screw and tighten the puller nut
until the bushing is removed.
b. Replacement t.
(1) Slide the bushing over the burnishing end of tool
C-3053 and insert the tool and bushing into the bore.
(2) Drive the bushing and tool into position using a
hammer (figure 11-31).
Figure 11-33. Camshaft and Sprocket Assembly.
b. Camshaft Bearings. If the camshaft bearings are not
damaged, and the original camshaft is being reinstalled, the
bearings do not have to be replaced. Proceed to c, below.
If the bearings are damaged, or if a new camshaft is being
installed, replace the bearings as follows:
(1) Drive out the rear cam bearing core plug.
(2) Install the proper size adapters and horseshoe
washers (part of tool C-3132-AL) at the back of each bearing
shell to be removed, and drive out the bearing shells (fig-
ure 11-34).
(3) To install new camshaft bearings, slide the new
camshaft bearing shell over the proper adapter of tool
Figure 11-31. Installing Distributor Drive Shaft Bushing.
C-3132-AL
(3) Tighten the puller nut. As the burnisher is pulled
(4) Position the rear bearing in the tool. Install the
through the bushing, the bushing is expanded to fit tightly
horseshoe lock and carefully drive the bearing shell into
in the block and is burnished to the correct size (figure
place.
11-14


