TM 9-2320-266-34
stall the overrunning clutch rollers and springs exactly as
s
shown in figure 18-24.
c. Low-Reverse Servo and Band.
(1) Carefully work the servo piston assembly into the
case with a twisting motion. Place the spring, retainer, and
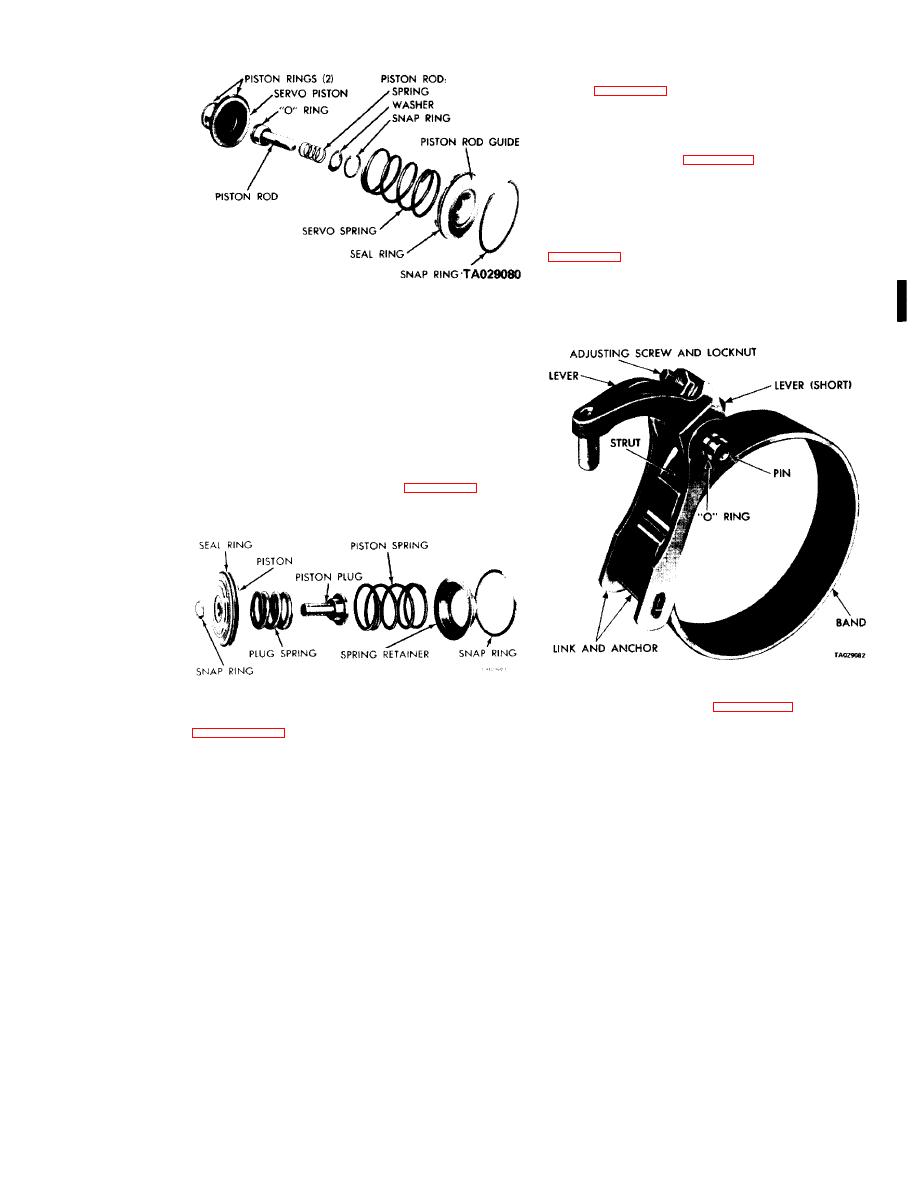
snap ring over the piston (figure 18-30).
(2) Compress the low and reverse servo piston spring
by using an engine valve spring compressor tool. Install the
snap ring.
(3) Position the rear band in the case. Install the short
strut, then connect the long link and anchor to the band
hold the strut in place. Install the low-reverse drum. Be sure
the long link and anchor assembly is installed as shown in the
Figure 18-29. "Controlled Load" Kickdown Servo
figure to provide running clearance for the low and reverse
(Rear Band).
drum.
c. Assembly.
(1) Grease the "O" ring and install it on the piston rod.
(2) lnstall the piston rod into the servo piston.
(3) Install the spring, flat washer, and snap ring to
complete the assembly.
18-14. Low-Reverse Servo and Band (Non-
Controlled Load].
a. Disassembly. Remove the snap ring from the piston
and remove the piston plug and spring (figure 18-30).
Figure 18-31. Low-Reverse Band and Linkage.
Figure 18-30. Low and Reverse Servo.
b. Inspection. Follow the inspection procedures given in
(1) Subassemble the kickdown servo as follows:
(a) Grease the "0" ring and install it on the pis-
c. Assembly. Lubricate and insert the piston plug and
ton rod.
spring in the piston. Secure it with the snap ring.
(b) Install the piston rod into the servo piston.
18-15.
Assembly-Subassembly
Installation.
(c) Install the spring. flat washer, and snap ring
a. General. The assembly procedures given here include
to complete the subassembly.
Installation of the subassemblies in the transmission case and
(2) Carefully push the servo piston into the case bore.
adjusting the drive train end play. Do not use force to
Install the piston rod springs and guide.
assemble the mating parts. If parts do not assembly freely.
(3) Compress the kickdown servo springs by using an
investigate the cause and correct the trouble before proceed-
engine valve spring compressor tool. Install the snap ring.
ing with assembly procedures. Always use new gaskets dur-
ing assembly operations. Use automatic transmission fluid
e.
Planetary Gear Assemblies, Sun Gear, and Driving Shell.
to Iubricate transmission parts during assembly.
While
supporting the assembly in the case, insert the output
through the rear support. Carefully work the assembly
shaft
b. Overrunning Clutch.
With the tranmission case in an
back,
engaging the rear planetary carrier lugs into the low
upright position, insert the clutch hub inside the cam. In-
18-15
Change 2


