TM 9-2320-266-34
the outer bearing, washer, and nut. Adjust the wheel
(3) Mount the steering knuckle to the control arms
bearing and install the cotter key and grease cap.
and install the ball joint nuts. Tighten them to 135 ft-lbs.
Install the cotter keys.
(6) Install the brake caliper and pads.
(4) Connect the tie rod end. Install and tighten the
(7) Install the wheel.
nut to 40 ft-lbs. Install the cotter key.
(8) Remve the jack, lower the vehicle, and test
(5) Slide the rotor assembly into position. Install
operation.
Section Il. MAINTENANCE OF THE SPRINGS
7-9. General.
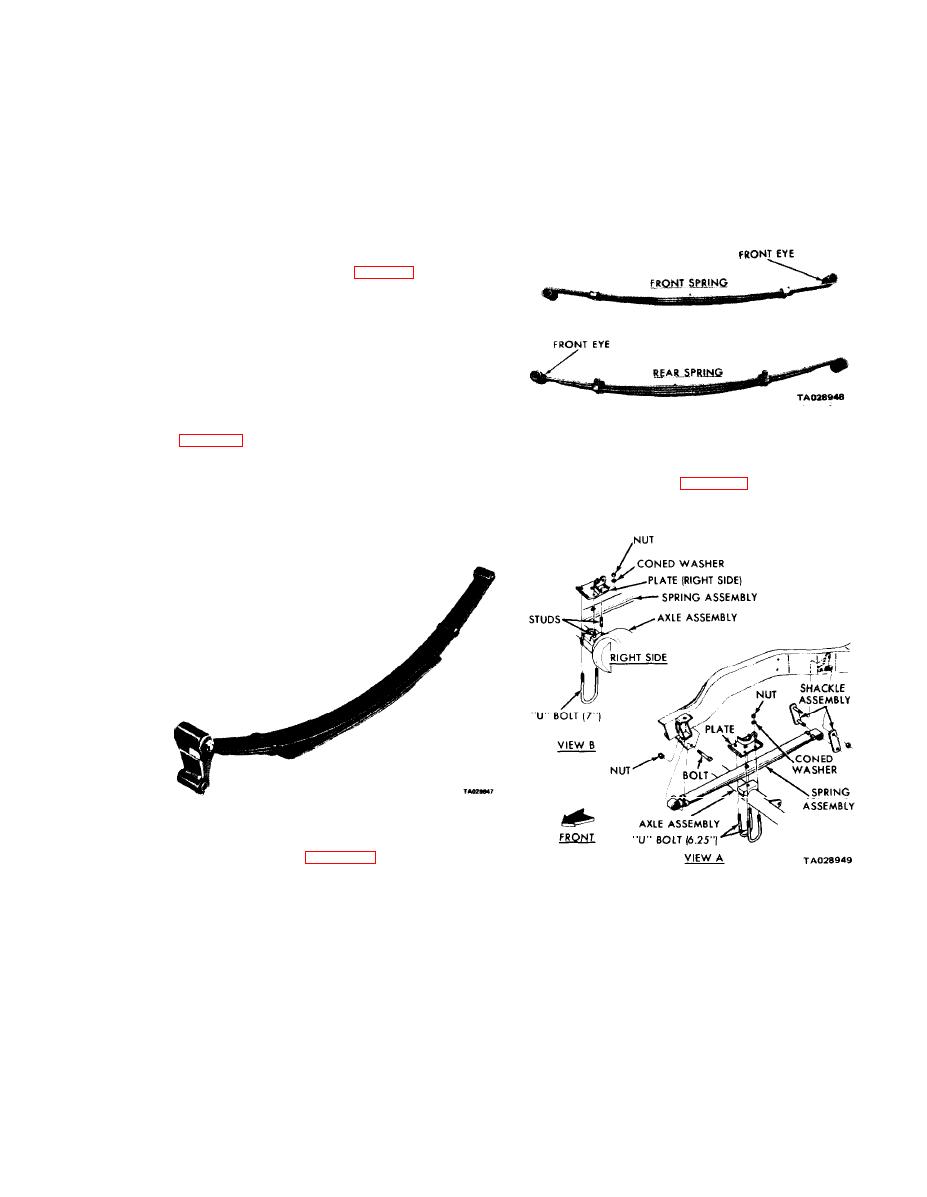
a. 4X2 Models. The 4X2 trucks use coil springs on the front
and progressive-type leaf springs (figure 7-9) on the rear.
Removal and installation instructions for the front coil
springs are contained in section I of this chapter. The
progressive-type rear springs used on the rear of these
trucks operate in two stages. The first stage, comprised of
the upper leaves, provides a low spring rate with light loads.
With heavier loads, the second stage of the springs gradually
comes into use. The lower leaves comes into con tact with
the upper leaves, providing increased spring rate.
b. 4X4 Models. The 4X4 trucks use leaf-type, fixed-rate
Figure 7-9. Leaf Spring Assemblies (4X4 Models}.
springs on the front and the progressive type on the rear
(figures 7-8 and 7-9).
(3) Remove the spring shackle bolts, shackles, and
the spring front eye bolt. Remove the spring.
NOTE
Models equipped with the S-250 Shelter
Kit (M883, M884, and M885) are equipped
with additional rear auxiliary springs.
Figure 7-8. Progresive Type Spring.
7-10. Front Springs in the 4X4 Model.
(1) Using a lifting hoist hooked to the towing eyes
Figure 7-10. Front Suspension (4X4 Models).
or to the frame attachment, raise the truck. Install jack
stands.
(1) Line up the spring fixed eye with the bolt hole
in the bracket and install the spring bolt and nut.
(2) Remove the "U" bolts securing the spring to the
axle.
(2) Install the shackle bolts, shackles, and nuts.
7-5
Change 2


