TM 9-2320-266-34
c. Removal The tappets can be removed without re-
(14) Adjust the spark plugs 100.035 inch gap and in-
stall them.
moving the cylinder heads by following this procedure:
s
(15) Install the distributor (TM 9-2320-266-20).
(1) Remove the valve covers.
(16) Install the coil wires, the temperature gage send-
(2) Remove the intake manifold (paragraph 3-4).
ing unit wire, the heater hoses, and the bypass hose.
(3) Remove the rocker arms and the shaft assembly.
(17) Install the vacuum control hose between the car-
(4) Remove the push rods and tag them to insure in-
buretor and distributor,
stallation in their original location.
(18) Install the accelerator linkage and adjust it as
(5) Slide tool C-4129-A through the opening in the
necessary.
cylinder head and seat the tool firmly in the head of the
(19) Install the distributor cap and wires.
tappet.
(20) Install the fuel line, alternator, and drive belt.
(6) Pull the tappet out of the bore with a twisting
Tighten the alternator mounting bolt to 30 ft-lbs. Tighten
motion. [f all tappets are to be removed, tag them to insure
the adjusting strap bolt to 17 ft-lbs,
installation in their original location.
-----
(21) Position the new valve cover gaskets and install
- AUTION-
C- - -
and tighten the cylinder head covers.
The plunger and tappet bodies are not
(22) Install the PCV valve.
interchangeable. The plunger and valve
(23) Fill the cooling system.
must always be fitted to the original body.
(24) Install the battery ground cable.
d. Installation.
3-7. Hydraulic Tappets.
(1) Lubricate the tappets.
a. Preliminary to Checking the Hydraulic Tappets.
(2) Install the tappets and push rods in their original
Before disassembling any part of the engine to correct
positions.
tappet noise, read the oil pressure at the gage and check
(3) Install the rocker arm and shaft assembly.
the oil Ievel. The pressure should be between 30 and 80 lbs
(4) Install the intake manifold (paragraph 3-4)
at 2,000 rpm. An excessively high or low oil level can cause
noisy tappets.
(5) Start and operate the engine. Warm it up to
b. Diagnosing Tappet Noise.
normal operating temperature.
--- ---
(1) To determine the source of tappet noise, remove
CAUTION
-----
the valve covers and operate the engine at idle.
To prevent damage to the valve mech-
(2) Feel each valve spring or rocker arm to detect a
anism, don't run the engine above fast
noisy tappet. The noisy tappet causes the affected spring
idle until all hydraulic tappets have filled
or rocker arm to vibrate or operate roughly.
with oil and have become quiet.
NOTE
3-8. Valve Timing.
Worn valve guides or cocked springs are
a. Turn the crankshaft until the number six exhaust valve
sometimes mistaken for noisy tappets. If
is closing and the number six intake valve is opening.
such is the case, the noise may be damp-
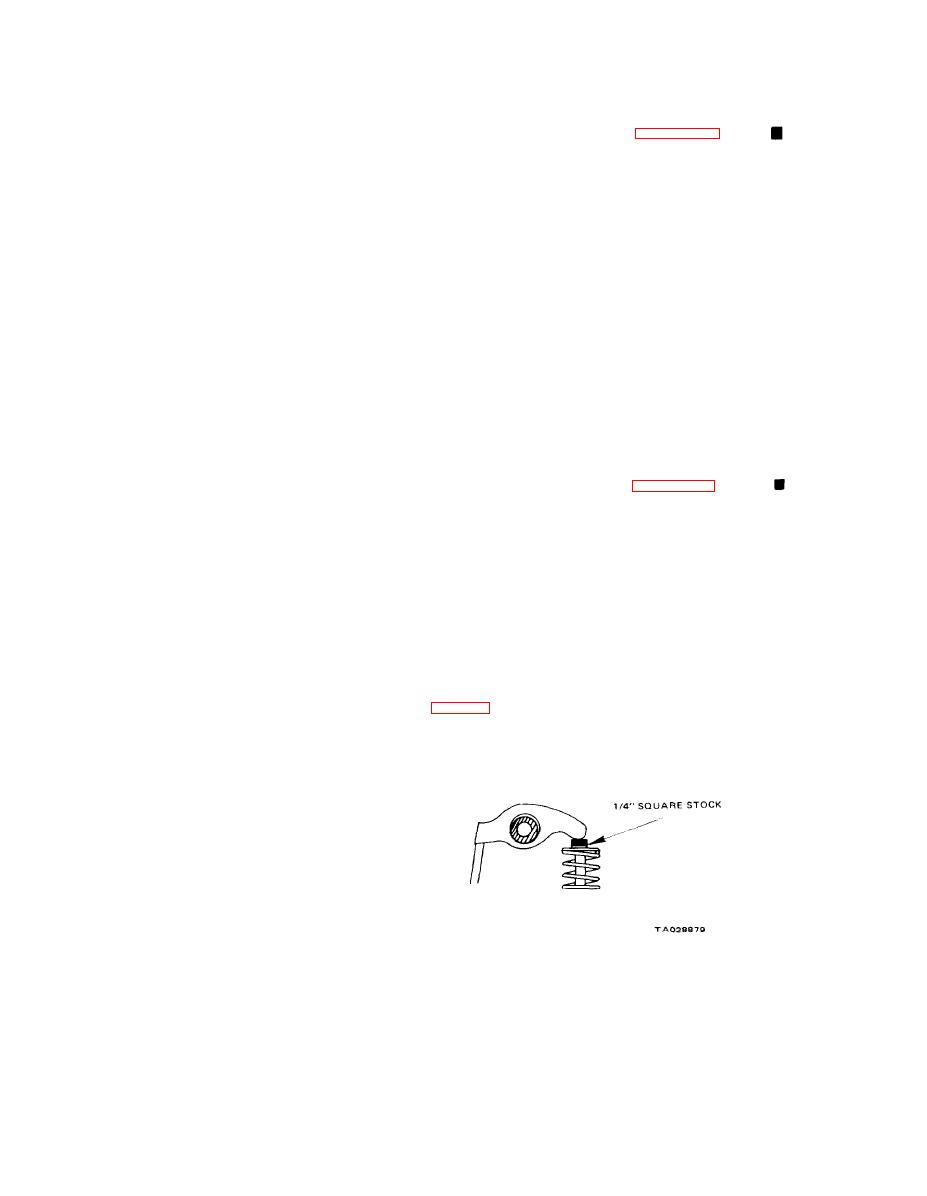
b. Insert a 1/4-inch spacer between the rocker arm pad
ened by applying side thrust on the valve
spring. If the noise is not appreciably re-
(second valve on the left blank).
duced, it is probably in the tappet. in-
spect the rocker arm, push rod sockets,
and push rod ends for wear.
{3) Valve tappet noise ranges from light noise to a
heavy click. A light noise is usually caused by a poor seal
between the tappet wall and the plunger. This requires re-
placing the tappet. It may also be caused by the plunger
partially sticking in the tappet body cylinder. A heavy click
is caused by a tappet check valve not seating, or by foreign
particles becoming wedged between the plunger and the tap-
pet body. This causes the plunger to stick in the down
position. This heavy click will be accompanied by excessive
clearance between the valve stem and the rocker arm as the
valve closes. In either case, remove the tappet assembly for
inspection and cleaning.
Figure 3-6. Inserting Spacer.
Change 2
3-4


