TM 9-2320-289-34
4-3.
ALTERNATOR TESTING AND REPAIR (M1010) (Con’t).
3.
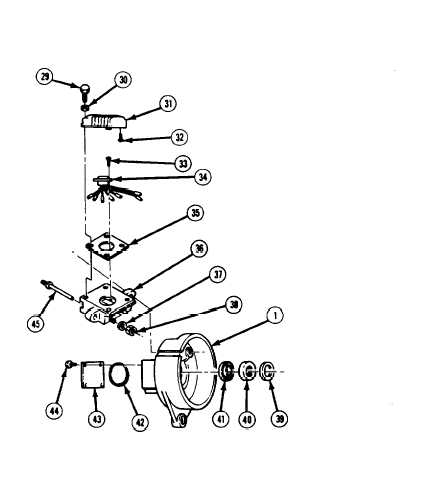
Install new outer seal (41) in slipring
end housing (1) with flat side facing
pilot holes. Press slipring bearing (40)
into slipring end housing. Install new
inner seal (39) flush with slipring end
housing. Install new “O” ring (42) and
cover plate (43) with 4 screws (44),
NOTE
Perform step 4 only if connector
(34) was removed.
4.
Install connector (34) on regulator
holder (36) with 2 screws (33). Install
regulator
with
connector
leads
through slipring end housing (1),
Install
connector
lead
through
grommet and brush holder adapter
hole.
5 .
Install 3 AC terminal studs (45) with 3
washers (37) and nuts (38).
CAUTION
Before
changing
position of
adjustment screw (32), ensure
that “HI*’ position hole in regulator
(31) is clear of obstructions.
Failure to follow this caution may
result in damage to regulator.
6 .
Ensure that adjustment screw (32) is in “HI” position if regulator (31) was replaced.
7 .
Install new gasket (35) on regulator holder (36). Install regulator (31) with 4 new Iockwashers
(30) and screws (29).
8 .
Connect connector (34) leads to AC terminal studs (45) and regulator holder (36).
9 .
Apply pipe sealant to screw (23) threads. Install 2 insulation washers (26), guard washers
(25), new Iockwashers (24), screws (23), and output terminal screws (5) on positive rectifier
(28) and negative rectifier (20).
TA50790
4-20