TM 9-2320-266-34
NOTE
(2) From underneath vehicle, position harness so
On the 1976 model the headlight cowl-
that it will follow the path of existing harness.
ings must be removed and also two screws
(3} From the rear left side of vehicle, route a "fish
at each end of grille.
tape" forward through main frame member until it exits
forward in the area where harness was dropped.
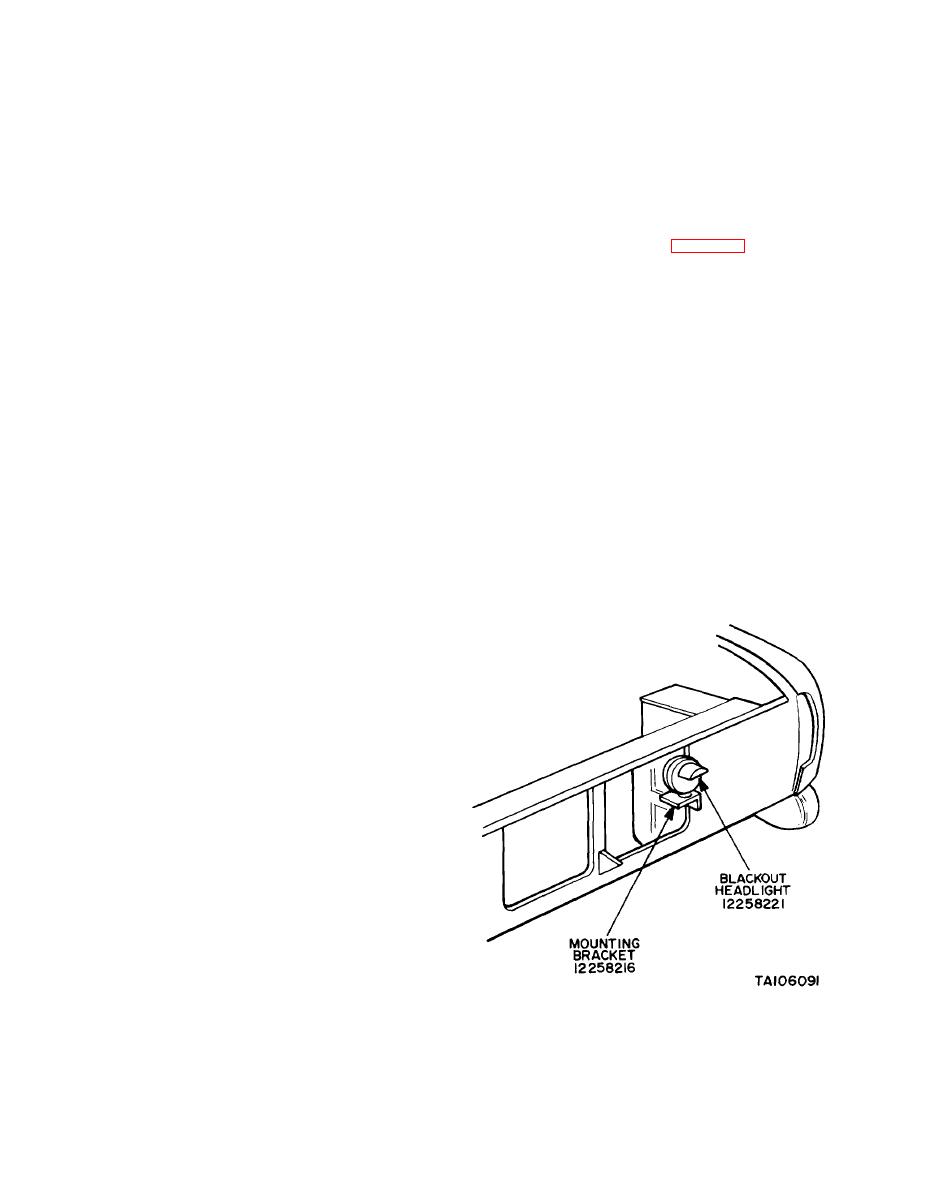
(2) Hold mounting bracket 12258216 and blackout
(4) After securing harness to fish tape and taping
headlight 12258221 on the left side of the radiator core
connectors around main cable for ease in routing cable
support on the four-inch wide, vertical surface which has
rearward, pull harness rearward until it is accessible. Route
the three horizontal stiffener ribs (figure 25-9). Position
harness along existing harness utilizing existing cable
the bracket so that the bottom edge of the mounting side
cIamps where available.
surface rests along the top of the second rib from the bot-
(5) Use self-clinching cable ties MS3367-1-9, to tie
tom, with the forward bolt hole located in the center of
harness to existing harness near both taillight locations
the double thickness area of the core support.
and in the area of the trailer connection.
(3) Mark holes so measurement from the top of
(6) Remove the four bolts and nuts which retain
the bracket to the bottom horizontal member of the radi-
the trailer receptacle and drop connector to an accessible
ator core support is 7-1/4 inches.
location. Remove grommet nut, slide grommet up wires
(4) Drill two holes 9/32 inches in diameter and
far enough to solder new wires into pins.
install bracket using two MS90728-6 bolts, two MS35335-33
(7) Remove the three grommet rods from positions
lockwashers, and two MS35649-2252 hex nuts.
A, C, and F.
(5) Mount head light in a level position on the
(8) Insert the three corresponding wires 24A, 24C,
bracket, using hardware already installed on headlight
and 23F of the new harness through grommet and solder
stud, connect wire 19 of harness to blackout headlight.
into pins A, C, and F respectively. Replace grommet and
(6) Replace parking lights if necessary and position
grommet nut and remount trailer receptacle.
grille (do not re-fasten) on the vehicle to determine section
of grille to be cut out and remove the section of the grille
NOTE
that would interfere with function of headlight.
Harness should be inserted into existing
(7) Front marker lights, 12258211, are mounted
cable clamps on top of inner fender and
directly above the vehicle headlights and centered on the
in radiator area where possible. New
vertical centerline of the headlights.
harness should be tied to existing harn-
ess at front left and right corners using
MS3367-1-9 cable ties. Harness should
also be tied at the left side of battery.
(9) In the forward area of vehicle, under the hood,
route the harness around the outside of the battery to the
top of the radiator area following existing harness under-
neath the top radiator mounting bracket and directing
connectors to the appropriate locations.
(10) Connect plastic housing which retains wires
27,28, and 31 into lower left open section of bulkhead
connector. Resecure connector.
(11) On those vehicles which do not have a trailer
receptacle, remove approximately 16 of the 19 inches of
the harness section containing wires 24A, 24C, and 23F.
Strip back the wrapping on the remaining section of the
harness so the three wires may be taped individually and
then taped together securely to prevent any exposure of
bare wires.
c. Lamp Installation.
CAUTION
Add paint to exposed bare metal
surfaces.
Figure 25-9. Blackout Headlight Mounting.
(1) Remove 13 screws from top and bottom of
grille, disconnecting parking light sockets when necessary,
and lift grille from vehicle.
Change 6
25-6


