TM 9-2320-289-34
6-19.
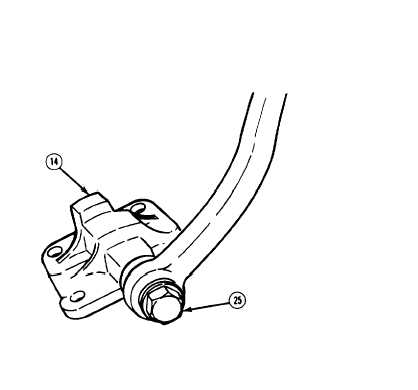
FRONT SPRING ASSEMBLY AND BUSHINGS REPLACEMENT (Con’t).
6.
7.
8.
9.
10.
11.
Inspect anchor plate
(14)
for
damage.
If damaged,
remove
stabilizer bar bolt (25) and remove
anchor plate.
Inspect shackle (5) and bushings (6)
for damage. If damaged perform
steps 8-11 to remove.
To gain access to shackle (5) and
bushings (6) on right side, disconnect
exhaust pipe from exhaust manifold
and lower exhaust pipe approximately
3 in. (7.62 cm), (See TM 9-2320-
289-20)
To gain access to shackle (5) and
bushings
(6)
on
left
side,
shift
transmission to “L”
(Low) and
remove plastic shield at rear of
fender skirt. (See paragraph 10-6)
Remove locknut (9), washer (8), and
bolt (4) . Remove shackle (5).
Discard locknut.
Drive out spacer (7) and remove 2
bushings (6) from frame.
b.
INSTALLATION
1.
If removed, install 2 bushings (6) at frame. Drive in spacer (7).
2.
If removed, install shackle (5) to frame with bolt (4), washer (8), and new locknut (9). Tighten
locknut to 50 Ib.-ft. (68 N.m).
3.
If removed, install anchor plate (14) and secure to stabilizer bar with bolt (25). DO NOT fully
tighten bolt.
CAUTION
Ensure that press tool contacts steel outer shell of bushing (24). Failure to
follow this caution may result in damage to bushing.
NOTE
Ensure that bushing (24) is lubricated with light lubricating oil before
installation, Installed bushing should protrude an equal amount on each
side.
4 .
If removed, press bushing (24) into spring assembly (2).
TA50606
6-126